1
PLA Sticking to Bed (lemmy.world)
submitted 1 year ago by [email protected] to c/[email protected]

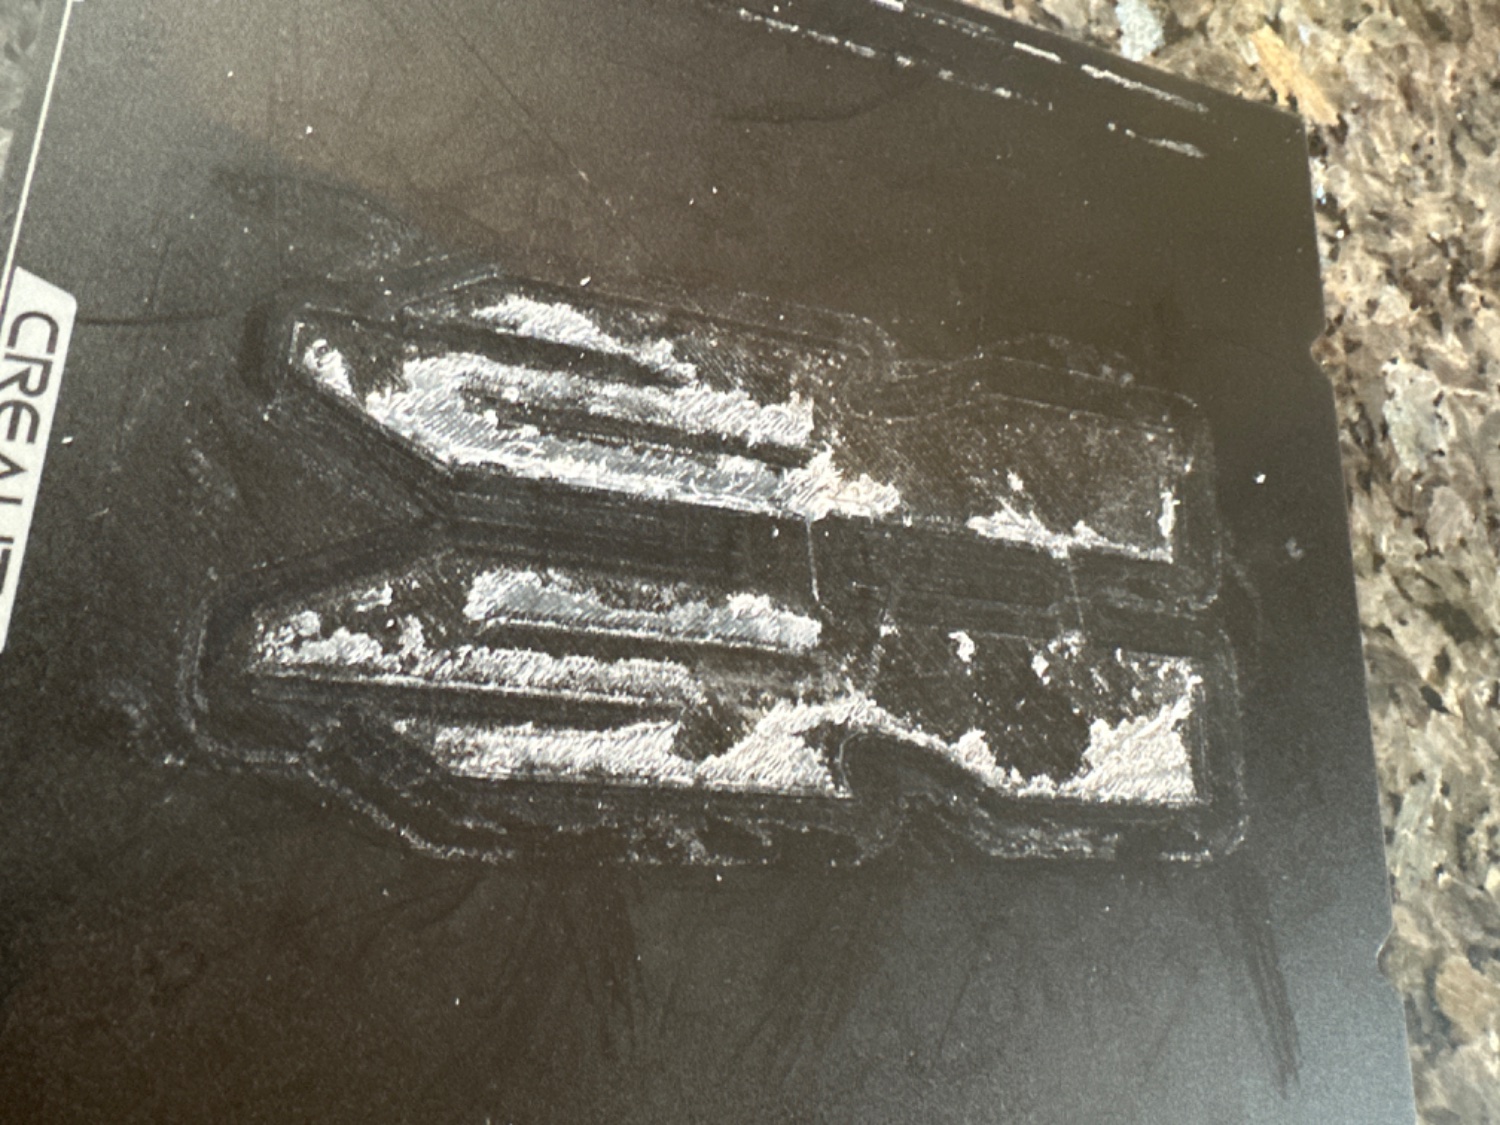
I’m a noob at 3D printing— I got my Ender3 S1 a little under a month ago. I’ve had great success on multiple prints using mostly default settings, up until last week. I had adhesion problems and was told it was likely my nozzle. I tried a spare nozzle and my next two prints were perfect. Since then I’ve had nothing but messy, blobby unsuccessful prints. More concerning, the prints are sticking to the bed so badly that all I can do is brutally scrape the PLA off. I’ve tried using iso alcohol but it doesn’t make much of a difference. I’ve heard acetone can damage the bed, and I don’t want to make it worse if it’s salvageable.

  1. Is my bed cover completely ruined?
  2. What should I do to prevent this in the future?

Thanks in advance. This is my first post on Lemmy and it’s exciting to see how quickly this community is growing!

top 8 comments
sorted by: hot top controversial new old
[-] [email protected] 2 points 1 year ago

Looks kinda bad, but once you dial in your settings, you can try printing large part over that area and hope they come off together. Using glue or hairspray can help, but I dont recommend that since its not needed for pla. With thin layer of glue you can probably keep using that bed tho. Better start with too high nozzle-bed distance and decrease in baby steps

[-] [email protected] 1 points 1 year ago

I can’t quite tell from the photo but I f you aren’t using any glue try using some magigoo or something, seems counterintuitive I know but it helps it release from my experience.

I would also heat your bed up to as high as it will go (I don’t have an wonder but 70 or 80 or something) which will soften the PLA and probably make it easier to get off, that has always helped me in the past.

[-] [email protected] 1 points 1 year ago

This looks like the stock ender 3 S1 bed. If you get the prints off you might actually pull the texture of the metal flex plate. Mine lasted a few days before I had multiple holes.

I got a textured PEI plate and I can't complain, prints self release when the plate cools and it doesn't have any defects after almost a year and about 100kg of filament.

[-] [email protected] 1 points 1 year ago

Just for reference, what sort of plate did you replace it with? I’m waiting on a Creality glass PEI plate that should be here soon and I’m hoping it will be better. Still not sure how this happened in the first place but from what I read it looks like the print head was too close to the plate and it ground PLA into the bed. I was using the same settings as always and I trammed and levelled before my first print. It seems to have done this every time I tried to print this particular object— Is it possible the actual gcode from Cura could cause this?

[-] [email protected] 1 points 1 year ago

Textured PEI flexplate.

[-] [email protected] 0 points 1 year ago

What are your print settings? Nozzle temp, bed temp, how close is the nozzle to the bed on the first layer, etc?

[-] [email protected] 0 points 1 year ago

200°/60°, and my Z offset is -2.71. Is this the same as first layer height?

[-] [email protected] 1 points 1 year ago

FYI, your Z-offset is really meaningless here. You have to calibrate the gap between your nozzle and bed, and you have to calibrate that for all four corners of the bed to be identical. THEN you have to determine if your bed is truly flat or if the center of the bed is higher/lower than the corners. And before starting any of that calibration, you need to make sure the springs under all four corners are tight (usually within 1 turn of completely closed) and then adjust your Z switch to match that position, otherwise you'll be re-leveling your bed after every few prints. (It occurs to me your machine may not actually HAVE a Z switch, but you still want the springs compressed pretty tightly.)

Yes yes, you have auto bed leveling built into your printer. Sorry to tell you, that doesn't really mean anything except you have to wait for it to calibrate before every print, when if you just learn to calibrate it manually then you shouldn't have to touch it again except maybe checking it every 6-12 months. In reality an ABL can only compensate so much, and if your bed isn't level to begin with then the ABL calibration will cause your printer to be constantly adjusting the Z axis for each layer and your prints won't be as smooth as they could be, and might not even be as strong. You want the bed to be level with the printer frame so that ideally the Z axis should never have to adjust when printing each layer.

As for your goal in the nozzle gap... If your first layer is 0.20mm thick then you want a little squish, so you're probably going to be shooting for around 0.15mm of actual gap. This is where a set of digital calipers comes in handy. Find one of the many first-layer test prints and give that a run (you probably need to find out how to disable your ABL for this). After it prints, you should have five small circles or squares in the corners and center. Measure the thickness of each, and look closely at them. Notice the individual strands of filament running through each piece. Can you see gaps between these strands? Can you pull it apart in your fingers? Then your nozzle gap is too large and the nozzle should be closer to the bed. Alternatively, is the piece solid, but very rough on the top? If so, your nozzle is likely too close to the bed. Your goal here is to get test prints that are smooth on top but will not come apart. When you have manually calibrated your bed leveling correctly, the ABL should calculate a Z offset of nearly zero.

My quick estimate of what is causing problems with your prints sticking so badly to the bed -- The nozzle is way too close to the bed, so close that the ABL cannot compensate, and the heat is literally fusing the filament with the bed. I can also see where you've had to scrape previous prints so hard to get them loose that you left marks in the bed, which is another sign that the gap was too small. Yeah it may be a lost cause at this point, but that's why beds are replaceable. Learn what mistakes you made and ask questions sooner with the next bed. There is a huge learning curve to get started with 3D printing and you will certainly make other mistakes as you go -- don't worry, we all do it -- but you can avoid some things by reading a lot of posts in these groups to see where others failed. Until you reach the level of physically modifying your printer, damaging the bed will likely be one of the worst things that happens (I destroyed my original controller board because I changed one of the steppers and forgot to modify the wire). Hang in there, you'll get it figured out!

this post was submitted on 07 Jul 2023
1 points (100.0% liked)

3DPrinting

15282 readers
64 users here now

3DPrinting is a place where makers of all skill levels and walks of life can learn about and discuss 3D printing and development of 3D printed parts and devices.

The r/functionalprint community is now located at: [email protected] or [email protected]

There are CAD communities available at: [email protected] or [email protected]

Rules

If you need an easy way to host pictures, https://catbox.moe may be an option. Be ethical about what you post and donate if you are able or use this a lot. It is just an individual hosting content, not a company. The image embedding syntax for Lemmy is ![](URL)

Moderation policy: Light, mostly invisible

founded 1 year ago
MODERATORS