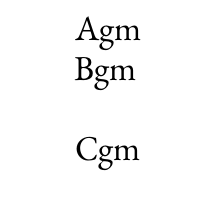
There's this guy called Stephan V. Bechtolsheim who wrote a series of books on TeX called "TeX in Practice". He's really good at the finer details of, well, everything.
In one of the books, he makes a macro to visualize boxes. It's built up over many pages and chapters with lots of small macros as building blocks. Because he's reusing these macros in different places, it makes a lot of sense.
However, when I wanted to use the box visualizing macro, I found that I had to look up and copy a lot of code to make it work. This was no fun, so I re-wrote it in a "flatter" way where it's just regular plain old macros.
I ended up with this:
\newdimen\linethickness \linethickness=0.4pt

\def\boxlines #1{%
    \hbox{%
        % Save original (argument) box
        \setbox0 = #1%
        % Place bullet at baseline and vertical align of the box
        \setbox1 = \hbox{\hskip -2.5pt \lower 2.5pt \hbox{$\circ$}}%
        \ht1=0pt \dp1=0pt \wd1=0pt
        \box1
        % Place a dashed line at baseline
        \setbox2 = \hbox to \wd0{%
            \xleaders\hbox to 4pt{%
                \hskip 1pt
                \vrule depth 0.5\linethickness
                	   height 0.5\linethickness
                	   width 2pt
                \hfil
            }%
            \hfil
        }%
        \ht2=0pt \dp2=0pt \wd2=0pt
        \box2
        % Place frame
        \setbox 3 = \hbox{%
            \hskip -0.5\linethickness
            \vrule width \linethickness height \ht0 depth \dp0%
            \hskip \wd0%
            \hskip -\linethickness
            \vrule width \linethickness height \ht0 depth \dp0%
            \hskip -\wd0%
            \hskip -\linethickness
            \dimen0 = \wd0%
            \advance\dimen0 by \linethickness
            \dimen2 = \ht0%
            \advance\dimen2 by 0.5\linethickness
            \dimen4 = \ht0%
            \advance\dimen4 by -0.5\linethickness
            \dimen4 = -\dimen4
            \vrule width \dimen0 height \dimen2 depth \dimen4
            \hskip -\dimen0
            \dimen2 = \dp0%
            \advance\dimen2 by -0.5\linethickness
            \dimen2 = -\dimen2
            \dimen4 = \dp0%
            \advance\dimen4 by 0.5\linethickness
            \vrule width \dimen0 height \dimen2 depth \dimen4
        }%
        \ht3=0pt \dp3=0pt \wd3=0pt
        \box3
        % Place original argument box
        \box0
    }%
}
The macro takes a box as an argument, for example
\boxlines{\box0}
It puts lines around the box, and marks out the baseline and the horizontal alignment. The neat thing is that the lines are made so that they don't interfere with the typesetting at all. Everything is placed as it would be without the lines.
If you have something that looks misaligned or strange, like these words:

it can help to visualize the boxes:
